It is frequently described as a riding habit from 1900 on pinterest, and thus the idea of a riding corset was born. As I dug more into the matter it became clear that this information perhaps was incorrect. This is according to the McCord Museum in fact a sort of street suit made in 1898 for a Miss Winifred Marler in Montreal. It is nevertheless a beautiful suit that stays on my list of dream projects.
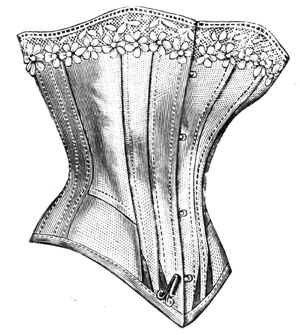
I had however already ordered a pattern for a 1891 riding corset from ageless patterns and decided to give it a go. The pattern was also printed in Fashion magazine De Gracieuse, but I really did not feel like re-sizing and printing myself. The pattern I bought is a multi-size one with a waist measurement ranging from 22-42''. From the information provided in the package, my conclusion was that the original size was 22''. Since my uncorseted circumference is around 26'' it seamed reasonable, taking a lacing gap and the intended use as sportswear into account.
 |
| 1891 Lady's Riding Corset |
Almost all of the materials for this corset came from my ever-growing stash. The strength layer is the same small weave herringbone coutil used in my recent edwardian corset. Wanting to challenge myself and make a beautiful corset I decided to add a fashion fabric, a champagne-beige silk. Some attempts to pin-roll it was made but it still turned out a bit wrinkly, probably because of the construction technique I used in the front. There the seams were sort of flat felled and made to hold the bones, all according to the instructions provided with the pattern. This was however greatly improved once bones were inserted and flossed.
 |
| Inside view. |
Otherwise the construction was really straightforward. The coutil and silk was treated as one and facings were added at the center front and back. Where the seam allowance couldn't be used to make casings I used twill tape. The lower edge is bound with bias binding made from the fashion fabric and the upper one with more twill tape because the fabric ran out. Boning is a mixture of 7mm spirals, 6mm flats and at the sides 11mm flats. The wide steels actually surprised me. Compared to the narrow ones I have these were much more flexible and provides great shape.
 |
| Laid flat |
The lace is also from stash, the white version of what I used for my red 1884 corset. Through it is run a green ribbon.
 |
| Front view |
 |
| Side view |
 |
| Back view |
 |
| Flossing detail |
 |
| Lace detail |
So what do I think about the end result? I have to say that I am very pleased. It is a beautiful corset with just the right amount of curve for me. There are a bit of wrinkles, but as it was my first time using a fashion fabric I wont dwell on that.
The only alteration made to the pattern was to take in the bust a bit and I am very happy with the fit. Wearing it is comfortable and I particularly like that it ends pretty high up on the hips. I guess that is a main feature of a riding corset.
Facts
The Challenge: Nr 1. Foundations
Fabric: Small weave herringbone coutil and silk
Pattern: 1891 Lady's Riding corset from Ageless Patterns
Year: 1891
Notions: Polyester thread, busk, three kinds of boning, eyelets, twill tape, ribbon, laces
How historically accurate is it? Pattern ok, materials mostly,construction plausible. Overall 90%
Hours to complete: 10-15 spread out over two weeks.
First worn: At home. Will definitely try riding in it.
Total cost: Prices listed in GBP
| 0,5m Coutil | 8 |
| Silk | 10 |
| Busk | 7 |
| 1,5m 6mm flats | 1 |
| 1,5m 7mm spirals | 1 |
| 0,5m 11mm flats | 0,5 |
| Laces | 2 |
| White lace | 2 |
| Green Ribbon | 1 |
| 18 5mm Eyelets | 2 |
| Total | 34,5 |
