Showing posts with label Unmentionables. Show all posts

Friday, 30 January 2015

1891 Lady's Riding corset

It was well over a year ago when I first fell head over heels in love with the ensemble pictured below:


It is frequently described as a riding habit from 1900 on pinterest, and thus the idea of a riding corset was born. As I dug more into the matter it became clear that this information perhaps was incorrect. This is according to the McCord Museum in fact a sort of street suit made in 1898 for a Miss Winifred Marler in Montreal. It is nevertheless a beautiful suit that stays on my list of dream projects.

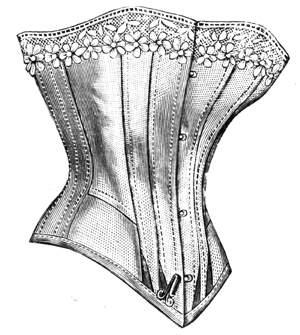
I had however already ordered a pattern for a 1891 riding corset from ageless patterns and decided to give it a go. The pattern was also printed in Fashion magazine De Gracieuse, but I really did not feel like re-sizing and printing myself. The pattern I bought is a multi-size one with a waist measurement ranging from 22-42''. From the information provided in the package, my conclusion was that the original size was 22''. Since my uncorseted circumference is around 26'' it seamed reasonable, taking a lacing gap and the intended use as sportswear into account.

1891 Lady's Riding Corset
First of all came a toile made from Ikea fabric MINNA, complete with a busk, waist tape, back lacing and boned with zip-ties and narrow spring steel. The fit of this toile was very pleasing, but as is usually the case with me and corsets, the bust had to be taken in.

Almost all of the materials for this corset came from my ever-growing stash. The strength layer is the same small weave herringbone coutil used in my recent edwardian corset. Wanting to challenge myself and make a beautiful corset I decided to add a fashion fabric, a champagne-beige silk. Some attempts to pin-roll it was made but it still turned out a bit wrinkly, probably because of the construction technique I used in the front. There the seams were sort of flat felled and made to hold the bones, all according to the instructions provided with the pattern. This was however greatly improved once bones were inserted and flossed.

Inside view.
Otherwise the construction was really straightforward. The coutil and silk was treated as one and facings were added at the center front and back. Where the seam allowance couldn't be used to make casings I used twill tape. The lower edge is bound with bias binding made from the fashion fabric and the upper one with more twill tape because the fabric ran out. Boning is a mixture of 7mm spirals, 6mm flats and at the sides 11mm flats. The wide steels actually surprised me. Compared to the narrow ones I have these were much more flexible and provides great shape.

Laid flat
The lace is also from stash, the white version of what I used for my red 1884 corset. Through it is run a green ribbon.

Front view

Side view

Back view
During the construction of this corset I invested in an eyelet setter from Prym. Best. Decision. Ever! So fast and quiet compared to using a hammer.

Flossing detail


Lace detail
So what do I think about the end result? I have to say that I am very pleased. It is a beautiful corset with just the right amount of curve for me. There are a bit of wrinkles, but as it was my first time using a fashion fabric I wont dwell on that.

The only alteration made to the pattern was to take in the bust a bit and I am very happy with the fit. Wearing it is comfortable and I particularly like that it ends pretty high up on the hips. I guess that is a main feature of a riding corset.

Facts

The Challenge: Nr 1. Foundations


Pattern: 1891 Lady's Riding corset from Ageless Patterns

Year: 1891

Notions: Polyester thread, busk, three kinds of boning, eyelets, twill tape, ribbon, laces

How historically accurate is it? Pattern ok, materials mostly,construction plausible. Overall 90%

Hours to complete: 10-15 spread out over two weeks.

First worn: At home. Will definitely try riding in it.

Total cost: Prices listed in GBP

0,5m Coutil8
Silk10
Busk7
1,5m 6mm flats1
1,5m 7mm spirals1
0,5m 11mm flats0,5
Laces2
White lace2
Green Ribbon1
18 5mm Eyelets2
Total34,5

Thursday, 9 October 2014

Ref W edwardian corset

I find it hard to believe that it has only been a little over a month since I posted the final post on the red victorian corset and that I have already made another one. The previous corset was an ongoing project for almost a year, and this one went together in barely a week.

So, what have I been making then? An edwardian corset using a pattern taken from a period original! I did have an edwardian corset from before, made up using Truly Victorians pattern TVE01, and I do love the look of it. The shape is however somewhat lacking in my opinion, the measurements are obviously adapted to our modern standard. It does provide some waist definition, but when applying a measuring tape the number it shows is almost bigger than my natural waist. Maybe it has to do with it being boned with flat steels only, I do not know.

Anyways, my fingers where itching for another project and I had been ogling the period patterns from Atelier Sylphe for quite some time, not being able to decide which one to pick. Then, Festive Attyre made a review for one of the patterns and I decided to be a copycat and buy the ref W pattern. I had been looking at it previously but been somewhat intimidated by the extreme hip-spring but theese fears were now pushed aside. The corset is listed as having a 21 inch waist which meant that it probably would fit me without any alterations (adding 2 inches for lacing gap and my natural waist is barely 25 inches). Some time ago in a discussion at the HSF facebook page, there was a discussion about the use of hip and bust pads to achieve the fashionable S-bend. Someone there purposed the theory that because many corsets of the time were sold off the rack in standard sizes most women would slip in a pad or two at various points to fill out the corset and its ideal S-curve. I do not have any references for this, but to me it sounds plausible. When looking at the pattern I therefor decided not to make any changes but instead pad away any fitting imperfections.

Ref W
I have yet do make a corset with a fashion fabric as the outer layer, simply because I find the coutil available to be so beautiful. This also makes construction a little bit simpler I imagine. For this corset I wanted to try out the drab small weave herringbone coutil from SewCurvy. It is quite breathtaking. While I was at it I ordered an 11'' busk, eyelets, lacing and 1'' twill tape from the same website. Shipping to Sweden is a bit costly, but the products are worth it.

The reason that this corset went together so rapidly is that I did not make a mock-up for the pattern. I know, you always should, but I was fed up with mock-ups after the last corset and wanted to evaluate the original fit of the corset anyway. So I traced the seamlines, allowances and the placement of the bone casing onto the fabric and cut it all out. The corresponding seamlines were aligned on top of each other and the allowances flat felled according to the instructions provided with the pattern. Nothing to complain about really, it went together smoothly.

In the pictures of the original corsets the bone casings look like they are made from twill tape, fitting two bones under each strip of tape. Attaching bone casings has been a bit tricky for me in the past. I believe most corset makes agree when I argue that the seams are much prettier if stitched from the outside of the corset, but to do this the casings must be secured to the inside and the exact seamline visible from the outside. For my TVE01 i attempted to solve this by basting the casings on from the inside using a contrasting thread and using these basting stitches as a guide in the sewing machine. This did work acceptably, but there were some errors and if the sewing machine needle had gone through the basting the contrasting thread was a bitch to remove. So this time I developed my own method. It looks dangerous and potentially is, but it worked well for me. Should you attempt it, be careful and set the speed of your sewing machine to the lowest speed.


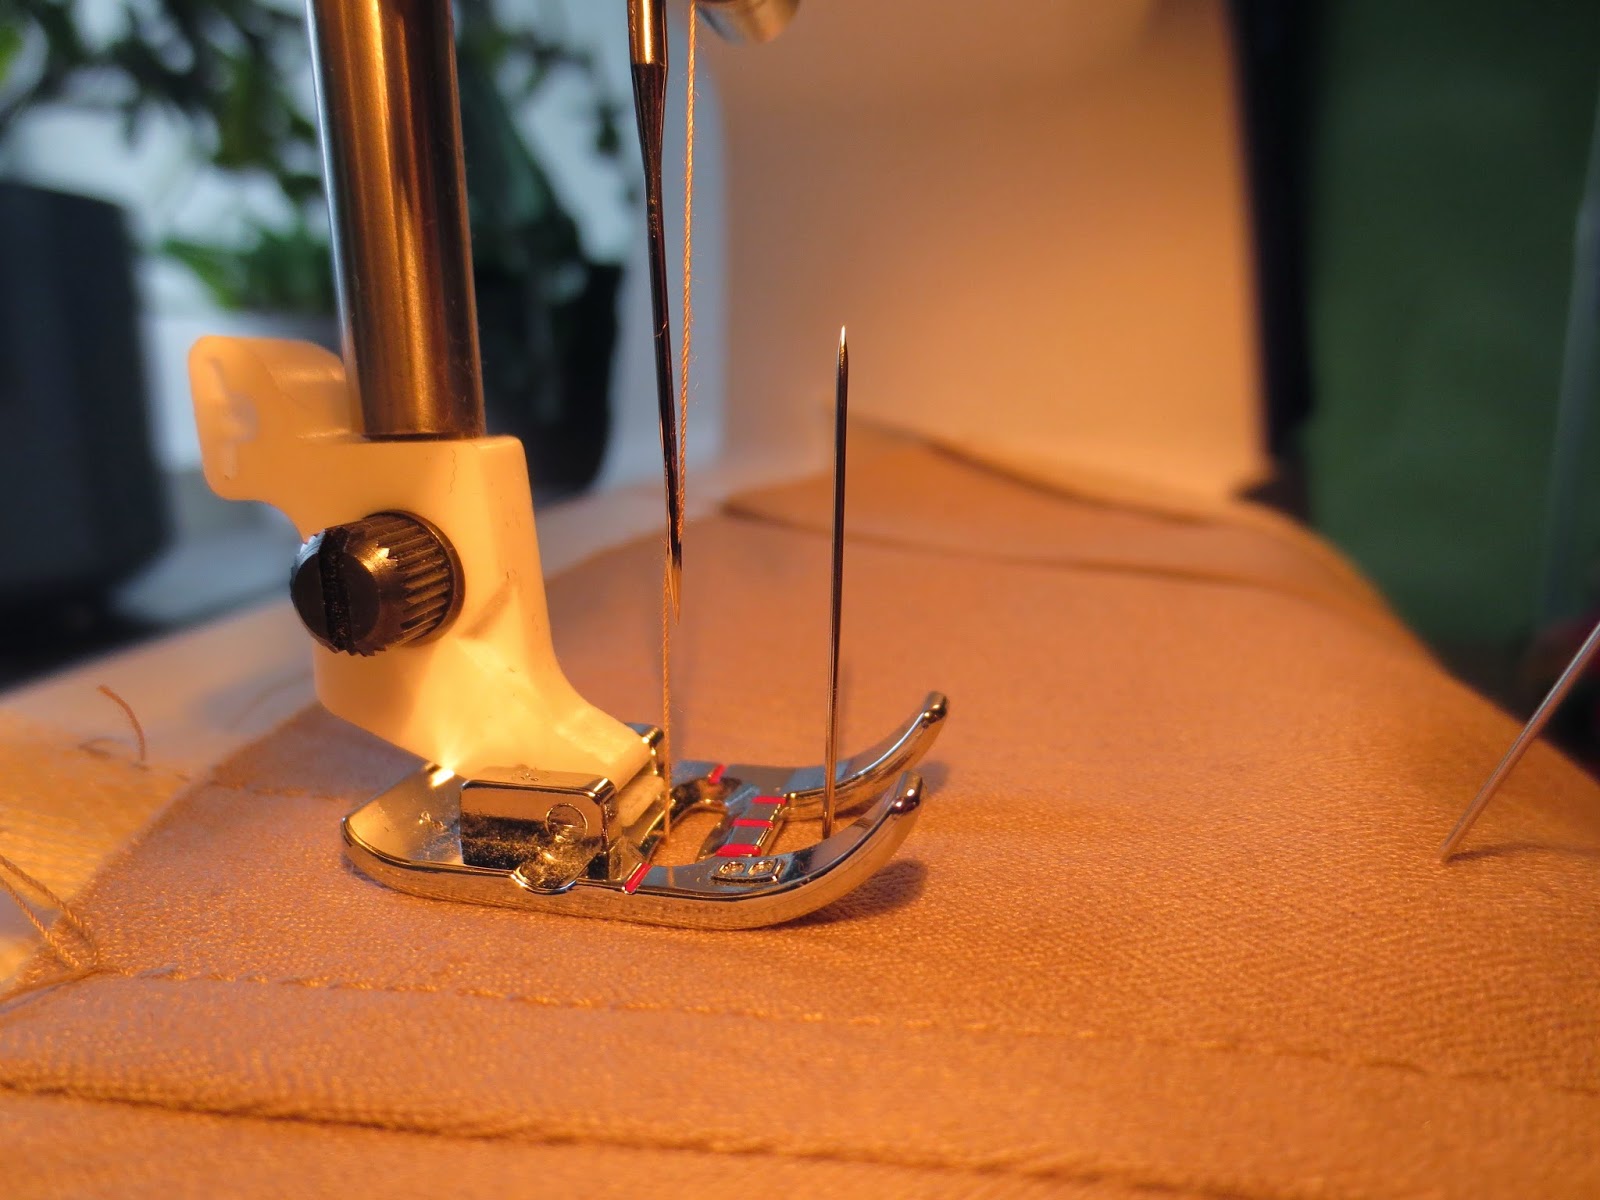
As said earlier, when I traced the pattern onto the fabric I took the time to include the bone casings. Now, with all of the pieces assembled, I filled them in with pencil and using flat headed pins went through the center of the twill tape strips first and then through the marked line on the corset. The pins were then pulled taut to really anchor the strips, as can be seen above. The pins were placed about an inch apart.


Close-up. Finished casings can be seen in the background.


What happened next was that I placed the corset in the sewing machine and using a longer stitch started making the seam, always aiming towards the next pin. The pins could of course not be sewn over, so before the presser foot reached the pin I stopped with the needle down, raised the foot and wriggled the pin out from the back. Then continue sewing and repeat.


Here you can see me moving the pin sideways and then pushing it back through the fabric. After that just reach under the fabric and pull it out. This technique was used for the middle of the three seams on each casing. The other two were sewn using only the presser foot as a guide.

The rest of the construction did not call for anything unusual. There are plenty of instructions for inserting a busk online and I used ordinary two-piece eyelets in the back. With my newly acquired tapered awl, also from SewCurvy, I could even insert them easily without punching holes through the fabric first. The lace along the top attached quite early so that I could set the eyelets on top of it.


Assembled and un-boned. The lace is from my mothers stash, probably used for curtains some time in the past


Boning is mostly spiral steel, even though the original used flat ones. I simply find the spiral ones more comfortable and easier to work with. The also enables more dramatic curves compared to modern flat steels. They were allegedly invented in 1904 by a Mr Beanman, but weather they were used widely from the start I know nothing of. The bones on either side of the  eyelets are flat steel, as are the ones closest to the busk (I ran out of endcaps).


After all the bones went in it was time for binding. Inspired by Jill Salen's book "Corsets" I wanted to try using twill tape for binding, as is commonly done on antique corsets. I used the same twill tape as for the bone casings but tea-dyed it first (here is the tutorial I used, three bags of PG tips did the trick). I will definitely use twill tape for binding again, it was very easy to attach it and the result is very pretty.

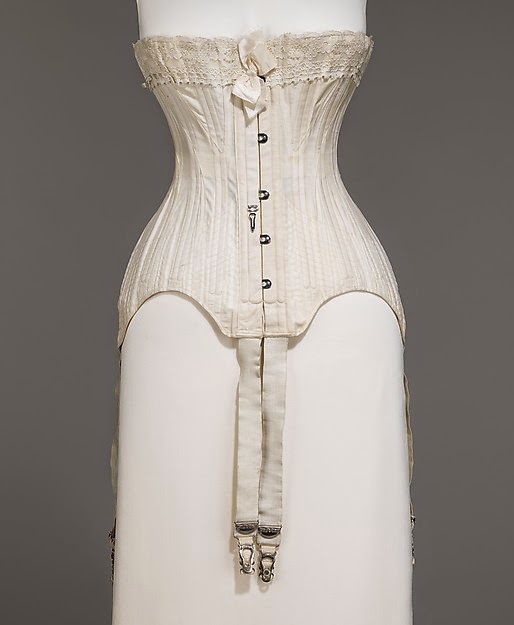
Garters on this type of corset were generally covered or made from frilly elastics. I decided against covering because I could not decide what colour to use. Frilly elastic was on the other hand impossible to find in an appropriate colour. The dream would be to have garters as on this antique example (ebay wont let med copy the images, sorry). It is too bad that elastics or garter clips like that cannot be found anymore. I did however find two examples where very plain elastics were used:

The Met 2009.300.3124a, b

The Met 2009.300.2759a–g
Eager to get the corset finished I ordered elastic, garter clips and lever adjusters from Ebay. These were the widest I could find. Assembling them was straightforward, Bridges on the Body has a good tutorial here. The hardware she uses is just amazing, but the post is four years old and the link to where she bought them has sadly stopped working.

The original ref W corset only had garters attached at the front, but I decided to put one on each side in order to prevent them standing away from my body like a weird pair of wings. I did not use any fancy method to attach them to the corset because I was in quite a hurry, they are just stitched on with the sewing machine.

Now for some pictures of the finished corset!

Inside

Outside
Detail of boning channels. Flat felled seams visible behind.
Eyelets inserted over lace. Tea-dyed twill tape binding

Lace matched at center front.
Garter. The white at the end barely shows when attached to stockings
Next are pictures of the corset on my mannequin. It does not make it justice as it is somewhat larger than me and much less squishy.


I will attempt to take some pictures of it on me and with proper padding underneath. Stay tuned!

Tuesday, 2 September 2014

Finished 1884 corset - HSF 16

Finally! The corset is completed and photographed and will now be submitted to the historical sew fortnightly, challenge 16 - Terminology. Since I have been working on this piece for so long there has been multiple challenges where I wanted to post this, but here we are at last. I feel a bit sad about only making a corset for this challenge though, not taking the chance to make something more interesting. Anyway, enjoy the pictures and you will find the details further down. Pattern alteration and construction have been covered in previous posts.
Original illustration


Wearing my lovely Tavistock boots!


Tightening the laces just before the shoot. 

The Challenge: nr 16 - terminology

Corset – Originally an unboned, quilted, front-lacing under- bodice worn informally (1770-1820), any boned, stiffened, waist compessing undergarment (1820-present).

This is a steel-boned Victorian coutil corset and would thus fall under the latter category.

Fabric: About 1m of herringbone coutil dyed burgundy.

Pattern:
Taken from the dutch fashion magazine De Gracieuse 1884 For alterations, see this previous post.

Year: 1884

Notions: Busk: 6,5m of spiral and flat steel boning, 26 eyelets, laces (5m), silk thread for flossing, 1 m lace.

How historically accurate is it? I think I did pretty well with this one. The pattern is definitely accurate, although I altered it quite a bit. Materials are correct apart from the spiral steels which were not invented in 1884. In my (limited) experience this kind of shape could however not have been achieved with flat steel only. Brightly coloured, double layer corsets were quite common as I understand it. I have not found any source regarding how they were constructed though, so there I am reaching in the dark. All in all I would estimate 85%

Hours to complete: Did not keep count, but somewhere in the range of 20-30h, not including mock-ups.

First worn:
Around the house and for the photo shoot.

Total cost: All prices given in GBP

Busk 6,85
Coutil 9,65
Red dye 10(-ish)
Boning 7
Lace 1,95
Eyelets 4,47
Laces 1,75
Silk thread 4
45,67

Wednesday, 11 June 2014

1900s Petticoat

We will start of by looking at the first piece I made to go with the 1903 corset, the petticoat. This was the first petticoat I have ever made and it involved a bit of improvisation, but I am overall pleased with the result. My main inspiration was the Edwardian petticoat from Past Patterns:
Past Patterns Edwardian petticoat
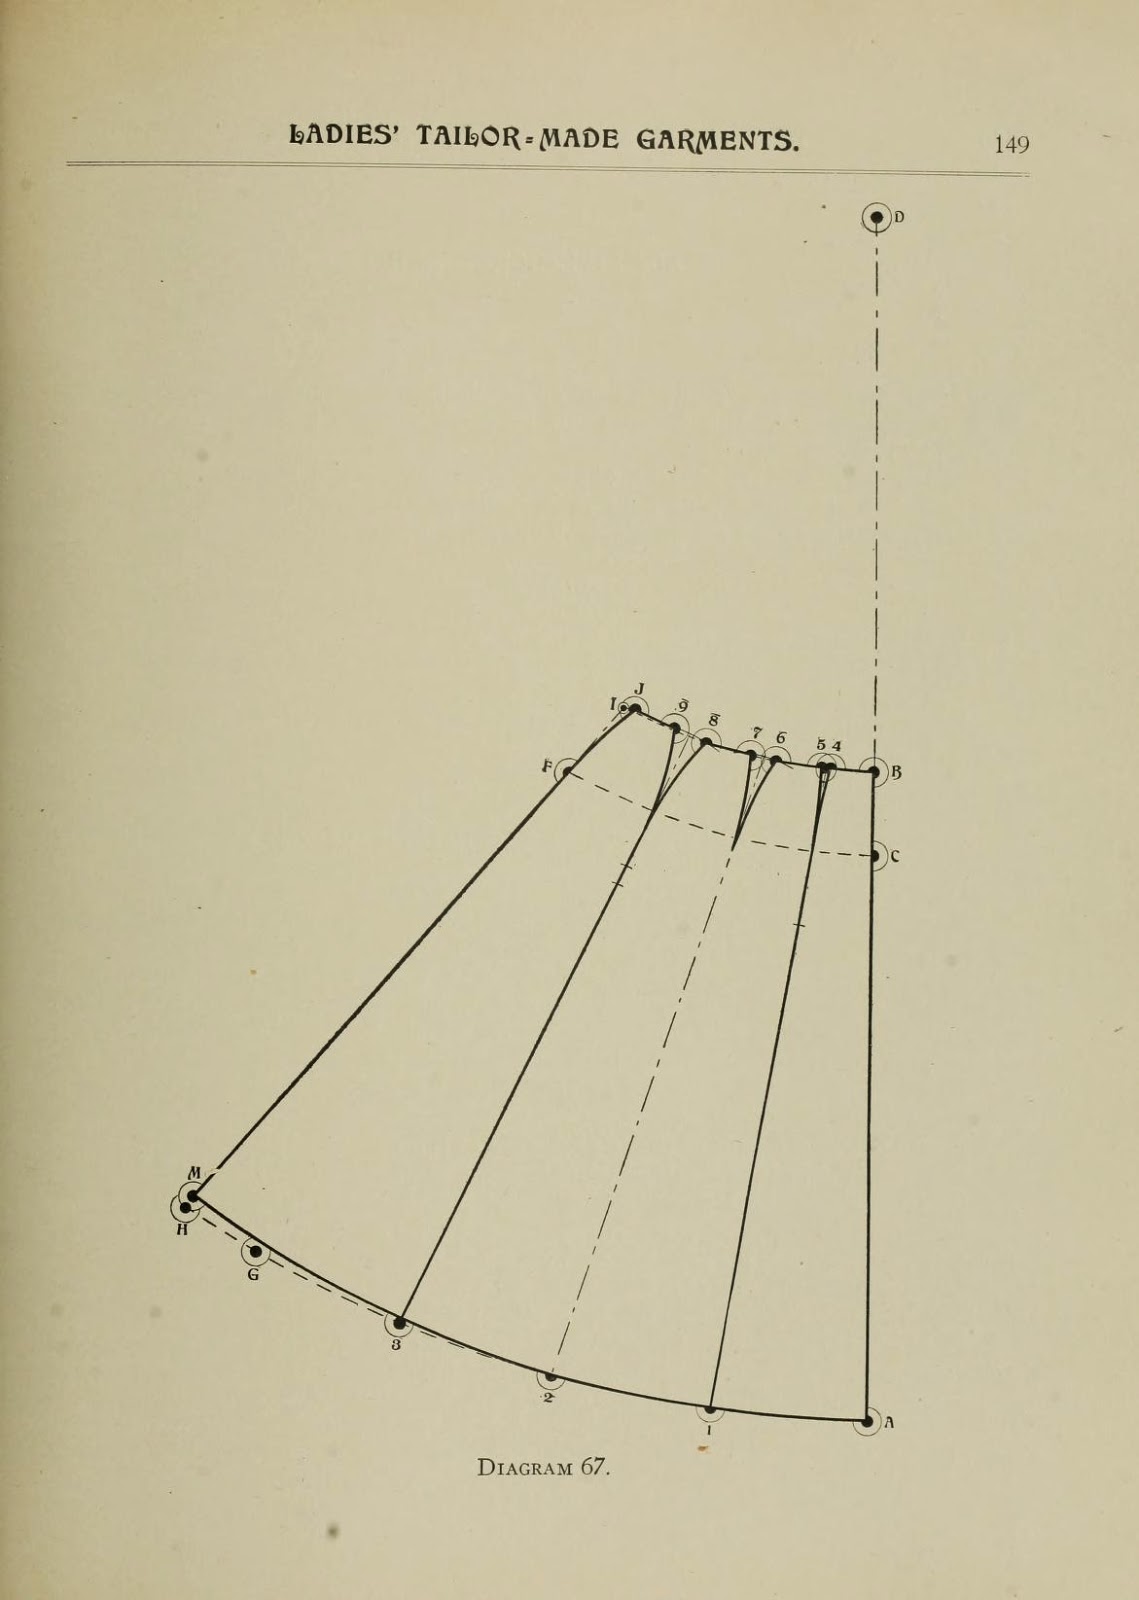
Sadly, I did not buy the pattern since it would require shipping from the US to Sweden. Instead I went to a pattern making book published in 1908 that is readily accessible online and that I have been dying to try out. Perhaps I made an over complicated petticoat when I choose to use the pattern for a five-gored skirt that is fitted over the hips. From what I have understood, the patternpieces for an underskirt is often just squares that perhaps taper towards the waist. Anyway, the five-gore pattern is the one that I used and I did not alter the measurements from the books since they appeared to be quite close to my own.
Pattern diagram and description
After I drafted the pattern I cut it about knee-high and tried to add some width to create the flounce. In retrospect, even more width was needed.

I used a plain, cheap cotton fabric from Ikea for the whole petticoat. Construction was pretty straight forward and it is mostly machine finished. The side seams were all french seams, the placket was made in a single strip and I made an ordinary belt. I had never made a placket before, so the eBooklet on plackets from Cloak and Corset was very helpful. The finished petticoat, somewhat dirty after having been dragged across wet grass in the botanical garden, is seen below.
Front
Side
Back
Placket and a few pleats made to fit the skirt to the belt
 For decoration I covered the seam joining the flounce and the body of the skirt with lace beading and inserted a satin ribbon matching the corset.

Lace beading

A bit further down there is a lace insertion for which I followed a tutorial from Wearing History. I also added some 1cm wide tucks for decoration and to reduce the length.

Lace insertion and tucks
I dithered for quite some time on how to finish the bottom edge of the petticoat and just two days before the picnic decided to add a row of gathered lace with a dust ruffle underneath. There was however no suitable lace to be found in the stash so I just put on the dust ruffle and covered the seam with some bias binding laid flat on top of the seam allowances.

Dust ruffle
The dust ruffle is made from the same cotton fabric. I cut loads of 10cm/4 inch wide strips that were hemmed on one side. I used a presser foot that makes the hem automatically, that device is really the best thing ever! The other side was pleated using the automatic ruffler extension to my sewing machine before being sewn to the bottom of the petticoat. At the moment I am not sure if I should look for a suitable lace to put on top of i at all, I rather like the look of it.

Last but not least, a picture of it being worn over the corset!